
Draft. This manual is new and still growing. If something here does not match what you see in the software, the software is right — tell us and we will fix the page.
Add boundary layers to a wall
Build the prism stack that resolves the near-wall flow, sized from the y+ you want rather than from a first-cell height you would have to work out yourself.
Runs on the free tier.
Steps
Select Boundary layers.
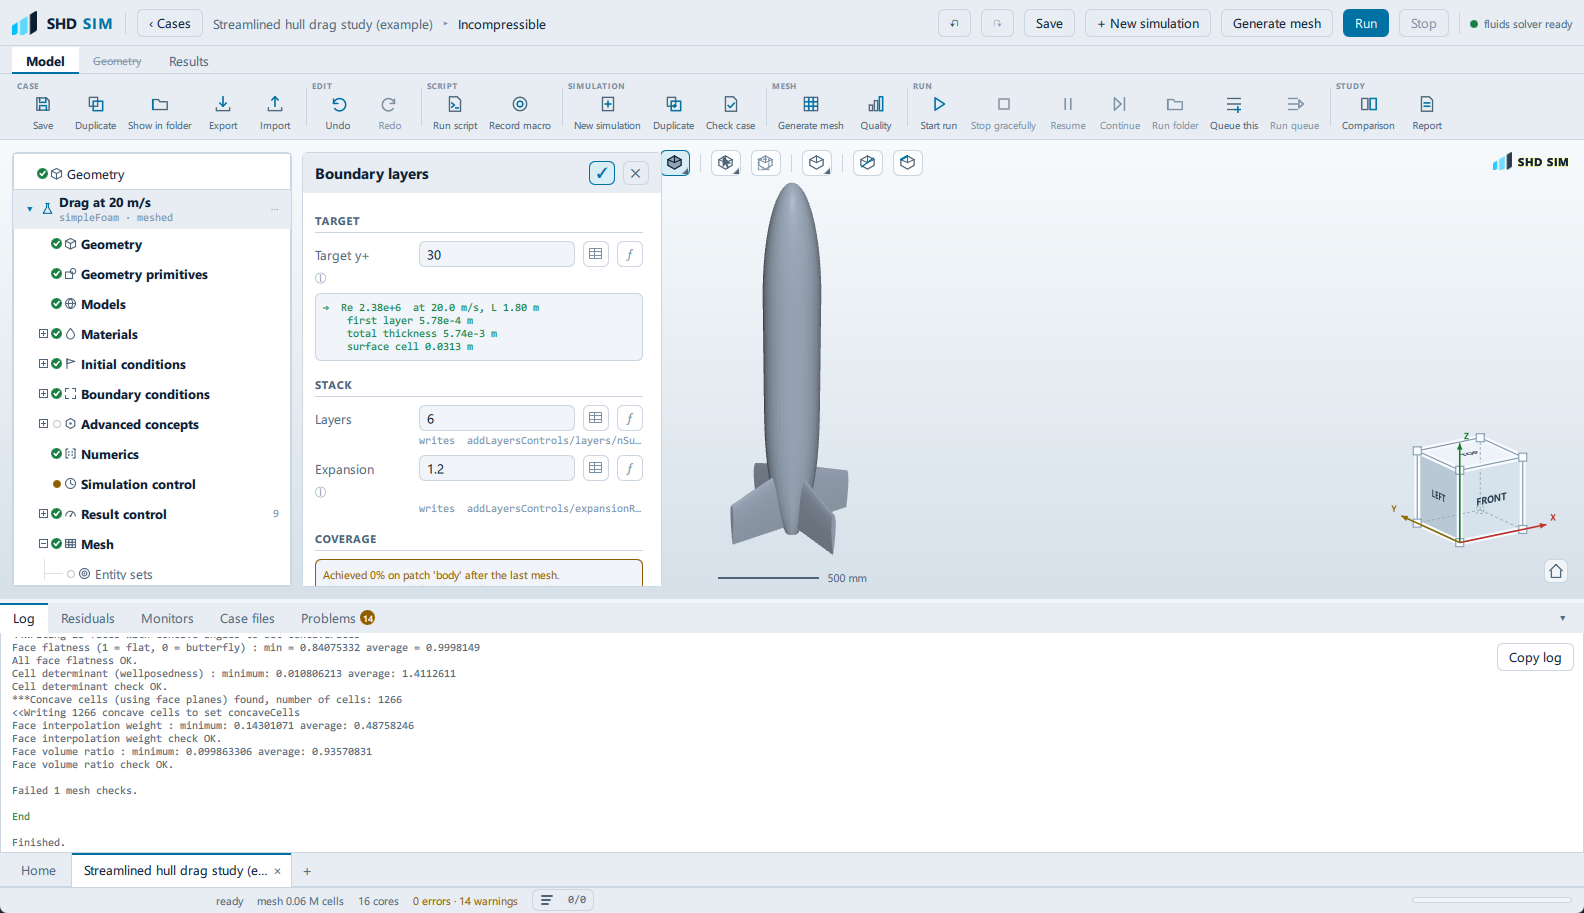
Set Target y+. The hint tells you which range applies to the Wall treatment chosen under Models — wall functions and a resolved low-Re wall want different things, and the two are not interchangeable.
Read the block underneath. It works forwards from the reference velocity, the reference length and the fluid to give the Reynolds number, the first layer height, the total thickness of the stack and the surface cell size. Nothing here is typed in; it follows from the target and the case.
Under Stack, set:
- Layers — how many prisms.
- Expansion — the growth ratio between them.
A warning appears if the stack becomes as thick as the surface cell, or if the first-cell aspect ratio gets high. Both are real problems: the outermost layer then sits against a much larger cell.
Press Generate mesh — the button is on this pane as well as on the ribbon, at Model → MESH → Generate mesh.
Come back and read Coverage. It names the patch and the percentage achieved on it after the last mesh. Below the 70% target a button appears directly under it: Add layers and grow them more slowly. Below 34% that button reads Take the layers off instead, and means it — a stack that stops partway is a transition, and taking it off usually leaves a better mesh than a quarter of a stack does.
When coverage is short
The coverage read-out tells you to relax the medial-axis controls. They are the Medial axis section on this same pane, drawn once Layers is above zero:
- Thickness / medial distance — how thick a layer may grow relative to the distance to the medial axis of the gap. Raise it to let layers fill a narrow gap; too high and two stacks meet in the middle.
- Min medial axis angle — how sharp a corner still counts as a medial axis, in degrees. Lower it to keep layers going into corners.
- Feature angle — above this angle between adjacent faces the layer is not carried across the edge.
- Layer iterations — how many times layer addition may relax and retry before giving up on the faces it could not extrude.
Below them, Layer placement is what to reach for next when those have not fixed it. Min thickness factor is the one that decides directly how much coverage survives: a layer thinner than that fraction of the first-layer thickness is dropped.
Scope
The stack is one setting for the case, not one per patch, and coverage is reported against the wall it was applied to. If different walls need different treatment, use a second simulation rather than expecting a per-patch control here.
Check it worked
- Coverage reports 70% or better.
- Quality has not degraded — layer addition is the step most likely to push skewness up.
- Add a y+ entry under Result control — + y+ in its Add section — before the run, and confirm afterwards that the achieved y+ is in the range the wall treatment needs.
Why y+ decides whether the turbulence model is being used correctly: Concepts.